 Shop
Shop My
My Custom


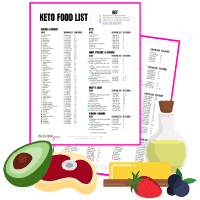
Free Printable: Low Carb & Keto Food List
Get It NowThis Cottage Cheese Wrap Recipe Is My New Favorite High Protein Lunch

This cottage cheese wrap has taken over my lunch rotation. While I’ve made cauliflower tortillas and jicama wraps in the past, I’ve been on a serious high-protein recipe kick lately, and these fit the bill better than any other wrap I’ve tried. Here’s why they’re my new favorite high-protein lunch:
- Surprisingly neutral flavor – Even though the main ingredient is cottage cheese, you can’t taste it. These protein wraps come out savory and mild, and work with almost any filling.
- Soft, flexible, better texture – These really are sturdy enough to roll without breaking. And while I’ve seen some recipes that use cottage cheese and eggs alone, I added a few simple extras that made the texture better.
- Super easy – This cottage cheese wrap recipe is ready in just half an hour, with only 5 minutes of actual prep time and minimal cleanup. And since it stores well, you can make it ahead.
- Packed with protein – Each wrap has over 19 grams of protein, and that’s before you add any fillings! Once I add those, I usually end up with over 40 grams for the meal.
- Just a few simple ingredients – Only 4 real food basics, plus optional spices if you like. They’re naturally low carb and gluten-free, too.
These cottage cheese wraps are a fun change from the usual lunch routine, and so easy to prep ahead. Grab your blender and make them with me!

Ingredients & Substitutions
Here I explain the best ingredients for my cottage cheese wrap recipe, what each one does, and substitution options. For measurements, see the recipe card.
- Cottage Cheese – This is the base of the recipe and what gives the wraps their protein boost. I usually use 1% or 2% cottage cheese, but you can use full-fat for a richer flavor and texture. I’m not sure if fat-free would work.
- Eggs – You’ll need 2 whole eggs and 2 egg whites. I tried this with one egg first and the protein wraps were not sturdy enough to roll. I also tried more whole eggs but they tasted very eggy; a mix of whole eggs and egg whites gave me the best texture and flavor.
- Mozzarella Cheese – Helps hold everything together and adds a chewy texture.
- Wholesome Yum Blanched Almond Flour – Gives the cottage cheese wrap a more bread-like texture. I recommend this one because it’s super fine, so your wraps don’t turn out gritty. Other types of flour would probably work — just avoid anything too coarse (like almond meal).
- Spices – A mix of Italian seasoning and garlic powder is optional, but covers up the cottage cheese flavor well without overpowering whatever you put inside.

How To Make Cottage Cheese Wraps
I have step-by-step photos here to help you visualize the recipe. For full instructions with amounts and temperatures, see the recipe card.
- Blend the ingredients. Add the cottage cheese, eggs, egg whites, mozzarella, almond flour, and any seasonings to a blender or food processor. Blend until the mixture is smooth and bubbly.
- Pour the mixture onto a parchment-lined baking sheet. Spread it out into a thin, even layer. I take it all the way to the edges.


- Bake the cottage cheese wraps. They’re ready when they look set and feel semi-firm, or you can leave them in a little longer if you want a more golden finish.
- Cool and cut. Once the wraps aren’t piping hot anymore, cut into rectangles.
- Fill and roll. Add your favorite fillings to one end of each piece and gently roll up your cottage cheese wrap. Repeat with the other pieces.


My Recipe Tips
- You can use a blender or a food processor, either one works. I used this blender, but the key is to blend until the batter is smooth.
- Make sure to spread the batter in an even layer all the way across the pan. If the edges are too thin, they can get crispy or burn before the rest is done. The easiest way to prevent that is to use a good, warp-resistant pan like this one and gently tap it on the counter after spreading to help everything settle evenly.
- You can flip the wraps, but not necessary. They’ll cook through just fine without it. But if you want that golden brown color on both sides, it only forms on the bottom. Wait until the cottage cheese wrap is mostly set, then flip gently. I find it helps to line a fresh piece of parchment on the pan first, then place the wrap face down onto it and carefully peel off the original paper.
- These sometimes puff up in the oven like a souffle, but will deflate quickly once you remove them. This is normal and fine.
- Let the cottage cheese and egg wrap cool completely before cutting. They firm up as they cool, which makes them much easier to slice and roll with toppings.
- The cottage cheese wrap can be delicate right out of the oven. The easiest way to move it is to slide the parchment paper straight from the pan onto a cutting board. Just go slow and support the bottom to avoid tears.
- Like most wraps, these are more flexible when warm. If they’ve cooled completely, you can gently microwave them or pop in the oven for a few minutes to soften. They do just fine cold after they are already rolled.
- Can you make round wraps instead? Yes, and I actually did this first. You’ll just need to leave 2 inches of space between them for spreading, which I found annoying because they didn’t fit on one pan. This does make them easier to flip if you want to go that route.
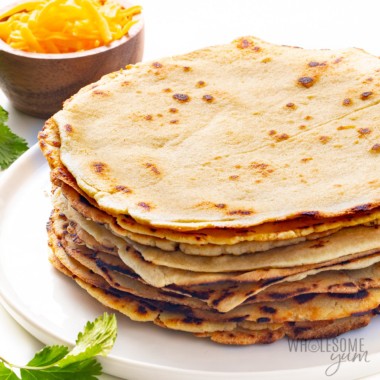
Cottage Cheese Wrap
My cottage cheese wrap has the best sturdy, rollable texture and makes an easy, high protein lunch. 19 grams of protein before fillings!
Instructions
Tap on the times in the instructions to start a kitchen timer.
-
Preheat the oven to 400 degrees F (204 degrees C). Line a large baking sheet with parchment paper.
-
In a blender or food processor, combine the cottage cheese, eggs, egg whites, mozzarella cheese, almond flour, and seasonings (if using). Process until smooth.
-
Pour the batter onto the baking sheet and spread, about 1/8 inch thick. (I spread it to the edges.)
-
Bake the cottage cheese wraps for 8-10 minutes, until semi-firm, or up to 15 minutes if you want them more golden.
-
Cool for at least 15 minutes. Slide the parchment paper onto a cutting board and cut the wraps into 4 rectangles. Add your favorite fillings to one end of each rectangle and roll up the wraps.
Did You Like It?
Leave a rating to help other readers (this also helps me continue to provide free recipes on my site), or get the recipe sent to your inbox.
Maya’s Recipe Notes
Serving size: 1 cottage cheese wrap
- Tips: Check out my recipe tips above to help you get the right texture, make the process smoother, and get the best result for each cottage cheese wrap.
- Storage: Keep the wraps in an airtight container in the fridge for up to 5 days. They can stick together, so I place parchment paper between them to avoid this.
- Meal prep: You can make a batch at the beginning of the week and keep them in the fridge or freezer for quick, high-protein wraps any time. I’ve also actually wrapped the fillings in advance and they kept pretty well — just avoid anything too wet.
- Freeze: You can freeze them for up to 3 months. Let them cool completely, then freeze in a zip lock bag with parchment in between them. Thaw in the fridge or on the counter before using.
I provide nutrition facts as a courtesy. Have questions about calculations or why you got a different result? Please see my nutrition policy.
Add Your Notes Your Notes
Try More Of My Recipes


© Copyright Maya Krampf for Wholesome Yum. Please DO NOT SCREENSHOT OR COPY/PASTE recipes to social media or websites. We’d LOVE for you to share a link with photo instead.
Cottage Cheese Wrap

Filling Ideas
In my pictures above, I stuffed my cottage cheese wrap with mayo, lettuce, tomatoes, red onion, turkey, and cheese for a classic deli vibe. Sometimes I add sliced avocado, bell peppers, or baked bacon.
These protein wraps also make the perfect base for sandwich-style salads. I’ve used them with my easy chicken salad (a go-to for lunches), crab salad or lobster salad when I feel fancy, and of course tuna salad, which is always a classic with some crisp lettuce.


Popular Recipes Right Now
Baked Chicken Legs
Taco Salad
Halibut Recipe
Sirloin Steak
Fresh Salsa
Sauteed Eggplant